

Warning
- To charge the product, only use a certified safety extra low voltage (SELV) supply unit with output rating 5 V, ≥ 1 A. For safe charging in a moist environment (e.g. in a bathroom), only use an IPX4 (splash-proof) supply unit. A suitable supply unit (e.g. Philips HQ87) is available via www.philips.com/support. If you need support finding the correct USB supply unit, contact the Consumer Care Center in your country. Using a non-certified supply unit may cause hazards or serious injuries.
-
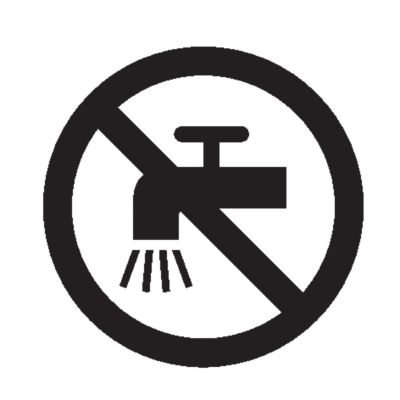
- Keep the USB cable, the USB supply unit and the charging stand (if provided) dry.
-
- This appliance is waterproof. It is suitable for use in the bath or shower and for cleaning under the tap. For safety reasons, the appliance can therefore only be used without cord.

- This appliance can be used by children aged from 8 years and above and persons with reduced physical, sensory or mental capabilities or lack of experience and knowledge if they have been given supervision or instruction concerning use of the appliance in a safe way and understand the hazards involved. Children shall not play with the appliance. Cleaning and user maintenance shall not be made by children without supervision.
- Do not modify the supply unit.
- Do not use the supply unit in or near wall sockets that contain an electric air freshener to prevent irreparable damage to the supply unit.
- Do not use a damaged appliance. Replace damaged parts with new Philips parts.
- Because of hygiene, only one person should use the appliance.
- Unplug the appliance before cleaning it with water.
- Only use cold or lukewarm water to clean the appliance.
- Never use compressed air, scouring pads, abrasive cleaning agents or aggressive liquids to clean the appliance.
- Only use original Philips accessories or consumables.
- Charge, use and store the product at a temperature between 10 °C and 35 °C.
- Keep product and batteries away from fire and do not expose them to direct sunlight or high temperatures.
- If the product becomes abnormally hot or smelly, changes color or if charging takes longer than usual, stop using and charging the product and contact Philips.
- Do not place products and their batteries in microwave ovens or on induction cookers.
- Do not open, modify, pierce, damage or dismantle the product or battery to prevent batteries from heating up or releasing toxic or hazardous substances. Do not short-circuit, overcharge or reverse charge batteries.
- If batteries are damaged or leaking, avoid contact with the skin or eyes. If this occurs, immediately rinse well with water and seek medical care.
Electromagnetic fields (EMF)
This Philips appliance complies with all applicable standards and regulations regarding exposure to electromagnetic fields.
Congratulations on your purchase and welcome to Philips OneBlade. To fully benefit from the support that Philips offers, register your new OneBlade at www.philips.com/welcome.
Tip: access tips, how-to videos and additional features by downloading the Philips OneBlade app, available for iOS and Android.
Refer to the packaging provided with your OneBlade to find out which accessories are included with your model. If you purchased your OneBlade online, please refer to the website. Additional accessories can be purchased at www.philips.com/parts-and-accessories.
- Protection cap
- SkinProtect blade
- Blade change light
- On/off button
- Battery charging indicator
- USB cable
- Note: A suitable power source (e.g. Philips HQ87) is available via www.philips.com/support.
- Body comb 1/8 in. (3 mm)
- Exfoliating glove
Not shown: travel case.
Warning: When you shave the inside of your outer labia, make sure that you stretch the outer labia in such a way that the SkinProtect blade cannot come into contact with the inner labia. Protect your inner labia with your other hand.
- Keep the SkinProtect blade flat against your skin.
- Move the blade against the direction of hair growth ('against the grain') for optimal results. The blade is double sided and can be moved back and forth.
- Your OneBlade can be used to dry shave, or wet shave with a foam or gel of your choice. You can even use it in the bath or shower.
- Store your OneBlade with the protection cap attached to avoid damaging the blade.
- If your OneBlade Intimate comes with an exfoliating glove, Philips recommends that you use it 24 hours before and 48 hours after shaving.
| Meaning | Action | |
 Battery indicator light: flashing orange | Low battery | Charge your OneBlade. |
| Battery indicator light: flashing white | Charging | Your OneBlade is charging. It cannot be used while charging. |
| Battery indicator light: white continuously | Fully charged | Your OneBlade is fully charged and can be disconnected. |
| Blade change light: green | Your blade is in good condition* | None. |
| Blade change light: orange | Consider replacing your blade | Replace the blade. Hold down the power button for 3 seconds to reset the reminder. |
*This is an estimate based on your usage and does not take into account any physical damage that may have occurred due to accidents or misuse. Always replace your blade immediately if you notice any damage.
- Insert the small plug into the OneBlade handle, then insert the USB plug into a USB power adapter. Plug the adapter into a 120V AC outlet. The charging indicator will begin to flash white
- Note: A suitable adapter (Philips HQ87) is available via www.philips.com/support. Because your OneBlade is designed to be usable in the bath or shower, it cannot be turned on or used while charging.
- To fully charge the battery, allow it to charge for 8 hours.
- When the white charging indicator lights up continuously, unplug the adapter from the power source, then remove the charging cable from the handle.

Your OneBlade has an operating time of at least 45 minutes when fully charged.
Use your OneBlade's SkinProtect blade to shave body hair on larger areas such as your arms, legs, chest, or stomach. You can use your OneBlade dry, or in the bath or shower with shaving foam or gel.
- Turn on your OneBlade.
- Place the flat part of the SkinProtect blade flat against your skin.
- Move your OneBlade against the direction of hair growth. Long, steady strokes work best. The SkinProtect blade is double sided and can be moved back and forth.
- Tip: use the fingers of your free hand to hold the skin taut in areas with creases and wrinkles. This allows the SkinProtect blade to glide across the surface of your skin and minimizes the risk of nicks and cuts.
- For best results, clean your OneBlade after each use.
- Styling hint: not all hairs grow in the same direction, so try moving the blade in different directions for best results. If you're shaving with foam or gel, rinse the blade regularly as you shave.


Always take extra care when shaving sensitive areas such as armpits, genitals, or any other body parts with thin or sensitive skin.
Important: when you shave the inside of your outer labia, make sure that you stretch the outer labia in such a way that the SkinProtect blade cannot come into contact with the inner labia. Protect your inner labia with your other hand.
- Place the flat part of the SkinProtect blade against your skin.
- Make short, steady strokes against the direction of hair growth. The SkinProtect blade is double sided and can be moved back and forth. Focus on one small area at a time, using the fingers of your free hand to keep the skin taut if required.
- For best results, clean your OneBlade after each use.
- Styling tip: dry shaving offers better control and visibility when shaving sensitive areas.

Use the body comb to trim your body hair to a uniform length of 3 mm (slightly less than 1/8 in.)
- Place the body comb onto the SkinProtect blade and press until it clicks into place.
- Place the flat surface of the comb against your skin.
- Make long, steady strokes against the direction of hair growth. The body comb is double sided and can be moved back and forth.
- Turn off your OneBlade.
- Hold the stem of the blade and gently pull off the comb.
- For best results, clean your OneBlade after every use.
- Styling hint: wet hairs stick to the skin, comb and blade, making trimming more difficult. Trim dry, clean hair for best results. If you do prefer to shave with gel or foam, rinse the blade and comb regularly to remove cut hairs.


Cleaning OneBlade spices

Your OneBlade and its accessories (with the exception of the charging stand and/or USB charging cable) are waterproof. For easy cleaning, simply rinse them under warm or lukewarm water and allow to air dry. For best results, rinse the blade for a few seconds with your OneBlade turned on.
Replacing the SkinProtect Blade

Your OneBlade comes equipped with a blade change light to provide guidance on when to replace your SkinProtect blade. The blade change light will light up in green when your SkinProtect blade is estimated to be in good condition and turn orange when it's time to consider replacing it. The blade change light's guidance is intended as an indication only, and your blade may last for less or more time depending on your hair density, the thickness of the individual hairs, and your usage.
Note: if you notice any damage to your SkinProtect blade, always replace it immediately. If you experience a decrease in performance before the blade change light turns orange, consider replacing your SkinProtect blade sooner.
When the blade change light turns orange:
- Hold the SkinProtect blade by its short edges and pull it off your OneBlade handle.
- The old blade can be discarded with your normal household waste.
- Hold the new SkinProtect blade by both short sides and insert the protrusions on the bottom of the blade into the slots on the OneBlade handle.
- Gently press the blade downwards onto the handle until it clicks into place.

After replacing the SkinProtect blade, hold down the power button for 3 seconds to reset the blade change light.
Storage

Store your OneBlade in a safe, dry location where it will not be crushed, banged, or subject to damage. To protect the blade, store the product with the protection cap attached. Do not wrap the cable around the product when storing, and do not place or store the product where it can fall or be pulled into a tub or sink, water or other liquid while plugged in.
Philips offers a 2-year warranty. Warranty exceptions apply. This warranty does not affect your rights as a consumer under law. For more information, visit www.philips.com/support or call us.
- AUSTRALIA Consumer Care: 1300 363 391
- REPUBLIC OF IRELAND 015 24 54 43, Northern Ireland: 0207 949 0240 (local rate)
- NEW ZEALAND 0800 658 224
- UNITED KINGDOM 0207 949 0240 (local rate)
For all product support, please visit www.philips.com/support.
AUS NZ warranty
For consumers under the Australian Consumer Law: Our goods come with guarantees that cannot be excluded under the Australian Consumer Law. You are entitled to a replacement or refund for a major failure and compensation for any other reasonably foreseeable loss or damage. You are also entitled to have the goods repaired or replaced if the goods fail to be of acceptable quality and the failure does not amount to a major failure. This is not a complete statement of your legal rights as a consumer under the Australian Consumer Law.
For consumers under the Consumer Guarantees Act 1993 (NZ): Our Goods come with guarantees that cannot be excluded under the Consumer Guarantees Act 1993 (NZ). In addition to the rights and remedies that you have under the Australian Consumer Law, the Consumer Guarantees Act 1993 (NZ) or any other relevant law, we provide the following warranty against defects (Additional Warranty):
- If, during the first 2 years from their date of purchase from the Supplier (Warranty Period), the Goods prove defective by reason of improper workmanship or materials, we will repair or replace the Goods without charge.
- In order to claim under this Additional Warranty you must contact us at our Australia and New Zealand Consumer Care team within the Warranty Period. You will be asked for details of the Goods, a description of the defect, your personal details and a copy of the purchase receipt. Upon accepting your claim, we will require that you return, at your expense, the Goods to one of our Authorised Service Centres. We will offer a repair, replacement or substitution at our discretion.
- This symbol means that electrical products and batteries shall not be disposed of with normal household waste.
- Follow your country’s rules for the separate collection of electrical products and batteries.
The built-in rechargeable battery must only be removed by a qualified professional when the appliance is discarded. Before removing the battery, make sure that the appliance is disconnected from the wall socket and that the battery is completely empty.
Take any necessary safety precautions when you handle tools to open the appliance and when you dispose of the rechargeable battery.
When you handle batteries, make sure that your hands, the product and the batteries are dry.
To avoid accidental short-circuiting of batteries after removal, do not let battery terminals come into contact with metal objects (e.g. coins, hairpins, rings). Do not wrap batteries in aluminum foil. Tape battery terminals or put batteries in a plastic bag before you discard them.
- Check if there are screws in the back or front of the appliance. If so, remove them.
- Remove the back and/or front panel of the appliance with a screwdriver. If necessary, also remove additional screws and/or parts until you see the printed circuit board with the rechargeable battery.
- Remove the rechargeable battery.
